408-569-9504


Cheerleading Workouts You Can Do At Home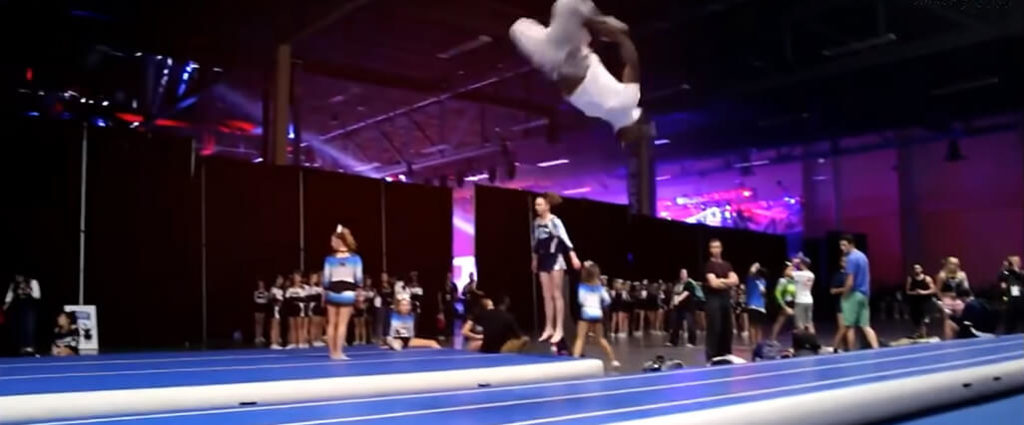
Cheerleading requires a lot of strength to toss other cheerleaders, ample balance and dexterity for those at the top of a pyramid and sufficient aerobic fitness to cheer throughout a sports game. Modern cheer is about building strength, confidence, and learning how to work as a team. Kids as young as four are drawn to this dynamic sport, creating an increase in the demand for high-quality cheerleading mats and equipment. Cheerleading mats are essential for helping athletes build strength, stretch, and learn skills and stunts. Consequently, the sport offers several important health benefits.
Warming Up
Light exercises and stretches or the cooldown phase help prevent any injury, increase blood flow, and reduce stress to your heart and muscles. Breathing in deep while cooling down before or after your workout helps deliver oxygen to your muscles, release tension, and promote relaxation. Bringing your heart rate and body temperature back to normal levels before you continue with your usual activities will help loosen strain in your body.
● Light jogging or walking
One of the most straightforward ways to cool down or warm-up is 10 minutes of jogging and/or walking. This is a great way to prepare your body for a tough workout. Alternating between 2 minutes of walking and 2 minutes of jogging is a great way to warm-up and increase that blood flow.
● Upper body stretch
1. Either from a standing or seated position, interlock your fingers together and press your hands up towards the sky.
2. Draw your hands up and back as far as you can while maintaining a straight spine.
3. Place your dominant arm in front of the other and turn your palms to face each other, stretching your hands up and back.
4. Repeat on the opposite side.
● Seated Forward Bend
1. Sit with your legs extended in front of you.
2. Lift up your arms.
3. Hinge at your hips to fold forward.
4. Place your hands on your legs or the floor.
5. Hold this position for at least 1 minute.
● Knee-to-Chest Pose
1. Lay on your back with one leg bent or extended.
2. Draw your other knee in toward your chest, interlocking your fingers around the front of your shin.
3. Hold this position for at least 1 minute.
4. Repeat on the opposite side.
● Reclining Butterfly Pose
1. Lay on your back with the soles of your feet together and your knees out to the sides.
2. Place your arms alongside your body or overhead.
3. Hold this position at least 5 minutes.
Stretching for Flexibility in Cheerleading
● Pike Sit
Sitting on the floor grab your toes and left both your heels off the ground, then grab your heels with legs locked and pointed
● Right Split
Your right knee is up and your left knee is down. Make sure that you have good posture so you need to push your hips forward while keeping your chest up.
● Left Split
Your left knee is up and your left right is down. Make sure that you have good posture so you need to push your hips forward while keeping your chest up.
● Full split
Arch your back with your head dropped back and hands reaching as far back as possible. Lay down on your front leg and while reaching to grab your heel. Combining the left and right splits now you’re just putting those extended straight legs together. Either Right or left leg in front of you and pushing your back leg as far as possible while maintaining good form.
● Middle Split
Keep hips in line with feet and feet on their sides pointed forward
● Bridge Push
Your hands are pushing over your shoulders with your head looking up to the ceiling, while your arms and legs are flat. You will push up through your shoulders with your feet flat, and keep your legs together and straight.
Fundamentals in Cheerleading Workouts
● Lunges
1. Stand in a split stance with the right foot forward and the left leg back The feet should be about 2 to 3 feet apart, depending on your leg length. The split stance will require balance, so hold onto a wall or chair if you feel wobbly Before you lunge, make sure your torso is straight and that you’re up on the back toe.
2. Bend the knees and lower the body down until the back knee is a few inches from the floor.
3. At the bottom of the movement, the front thigh should be parallel to the floor and the back knee should point toward the floor. The weight should be evenly distributed between both legs.
4. Push back up, keeping the weight in the heel of the front foot.
5. Repeat for all reps before switching sides.
● Cartwheels
1. Start in a lunge, put your dominant leg in front and bend it slightly. Your back leg should be straight. Your arms should be straight above your head, near your ears.
2. Put your hands on the ground with your hands turned 90 degrees.
3. Kick your feet over your head one at a time. The foot that kicks first should land first.
4. Land in a lunge facing the opposite direction you started from. Your arms should be over your head near your ears. Your front leg should be slightly bent, and your back leg should be straight.
● Handstand
1. Start in a lunge. Your arms should be straight above your head and your dominant leg should be in front slightly bent. Your front knee should not be over your ankle.
2. Kick up to handstand. You want to feel vertical and try to hold the straight body position by squeezing your bottom, your abs and trying to push through your shoulders. You want to try to pull your toes towards the ceiling.
3. Lower one leg at a time to land in a lunge. You should land in the same lunge that you started from.
4. The exercises and drills above should be able to help you learn how to do a handstand. If you do the strength exercises and get the muscles you need for a handstand, and then practice the handstand drills, we no doubt you will learn how to do a handstand soon.
To learn how to do a handstand click here.
Core Strengthening Cheer Workouts
Flips, holds, tucks, and other cheerleading skills require great core strength. Every muscular exertion starts from the core through bracing. For example, in-air tricks require the flyer to hold their entire core in order to move through the air gracefully and land safely. It is also incredibly important for balancing, which is needed during any cheer routine, but most importantly the flyer must remained balanced to prevent falling.
Scissor Kicks
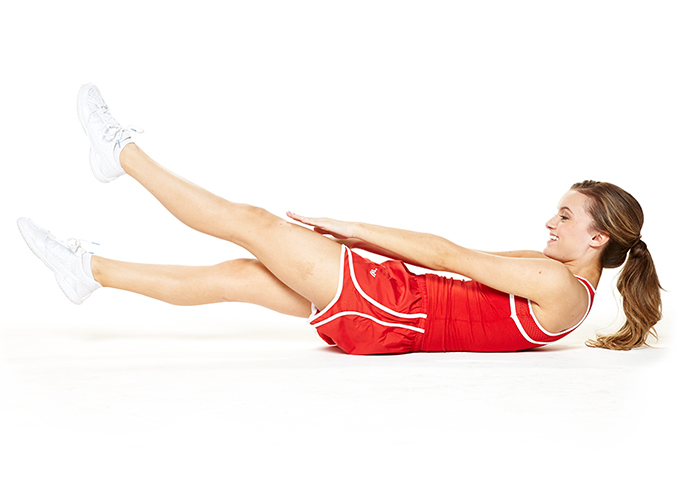
Lie on your back on the mat with your legs extended out in front of you. Place your arms by your sides, palms down. Lift both legs off the ground about six inches to twelve inches from the starting position at a 45-degree angle. The “scissoring” motion is when you switch your legs back and forth from each other. One leg will be crossing over the other.
V-ups
Lie face-up on the floor with your arms and legs extended straight out while lifted slightly off the floor. In one motion, lift both your torso and legs together as if you’re trying to touch your toes. Return to the first position where you first started. That is one rep.
Seat-Ups
Lie on your back with your shoulders and hands on the floor. Lift your legs at a 90 degree angle. Use your abs to point through your toes and lift your legs up towards the ceiling.
Leg Lowers
Lie face-up on the floor with one of your legs extended straight out while the other is flex to the ceiling. Contract your stomach and take a deep breath in slowly lower one leg to hover over the ground as you exhale. Continue to switch each leg from the starting position.
Jump Conditioning for Cheer
Jump conditioning is the second important exercise area for a cheerleader. You’re jumping, kicking, and tumbling, by having jump drills in your regiment will help build strength, stamina, and muscle memory. Repetition of good technique and form will help make it easier for you to go higher and land those tumbling skills. Check out Darin using the Home Air Floor on the cheer basics!
Fast Kicks
Fast Kicks or high kicks are the most basic yet vital cheerleading exercises you can do at home. Point your kicking foot from the floor to the ceiling until it returns to the ground. Your arms will be at a 45-degree angle at all times while kicking. Maintain good posture and keep your legs straight.
Side Hurdler
You can perform a left or right side hurdler. Throw your arms up at 45 degrees or a “V” position above your head with tight fists. Swing your arms toward each other, crossing your waist before swinging again. You’re jumping off the ground into the air with either your left or right leg straight out. The opposite leg at the knee is bent, with the inner thigh pointing at the floor.
Toe Lifts or Toe Touch
In this jump, the legs are straddled and straight, parallel to the ground, toes pointed, knees backward are pointing up, and your hands are in fists and arms in a “T” motion.
Floor Jumps
On the floor, start in a straddle position, where your legs are at 90 degrees spread apart. Your hands will be placed; on the floor in between your knees. Lift one leg two inches off from the floor, for a count of two, and then set it back down.
Double T Jumps
Doing a double toe lift or double toe touch is the same thing but done twice. In this jump, the legs are straddled and straight, parallel to the ground, toes pointed, knees backward are pointing up, and your hands are in fists and arms in a “T” motion. Do this again to perform the Double T Jump.
Cooldown Exercises in Cheerleading
● Standing quadriceps stretch
This stretch’s that front thigh muscle and can assist in avoiding injury’s before doing your sport.
1. From a standing position, bend your right knee to bring your heel toward your buttock.
2. Hold your ankle with one or both hands.
3. Keep your knees in alignment next to each other, and don’t pull your knee out to the side.
4. Hold this position for 30 seconds.
5. Repeat on the opposite side.
6. Do each side 2 to 3 times.
● Downward-Facing Dog
Downward-facing dog is a great stretch for not only your hamstrings, but great for opening your chest and stretching your shoulders.
1. From tabletop or plank position, move your hips up and back, keeping your spine straight.
2. Spread your fingers and press your weight evenly between your hands.
3. Pedal out your legs by pressing one heel into the floor at a time.
4. Hold this position for 1 minute.
● Head-to-Knee Forward Bend
This stretch’s your hamstrings which is important to avoid injury and creating long lean muscles.
1. While seated, extend your right leg and press your left foot into your right thigh.
2. Align your breastbone with the inside of your right leg as you raise your arms overhead.
3. Hinge at your hips to fold forward, placing your hands on your body or the floor.
4. Hold this position for up to 1 minute.
5. Repeat on the opposite side.